Our monitoring and operation center recently detected a site that had experienced three warning messages, the W7 FAN_OUT1_Warn, W8 FAN_OUT1_Warn and W9 FAN_OUT1_Warn. I then requested them to add the plant to a watchlist as it was the first time experienced, didn’t last long (cleared within 10 minutes ) and didn’t have any impact on the systems operation.

The same warning was experienced a few times after that every three days or so, so at this point a call was made to attend to this site. Assuming the worst (with the site being 400km from HQ), a spare 50kW inverter was brought with in case a replacement may need to be done, although most likely would just replace the fans in the inverter.
With this being an intermittent fault, my first priority was being able to recreate it. What I had initially noticed was that the warnings would only occur while the inverter was trying to charge batteries, this site doesn’t carry enough PV production to be able to support loads and charge batteries, so batteries only get slightly discharged to support some basic peak shaving so the inverter never really has much chance to be charging batteries and the fault would typically only occur under specific conditions.
Some pre site visit preparations had me attempt to manipulate its time of use table to allow a battery discharge and then a rapid recharge, however for reasons unknown at this point, the inverter was not obeying these commands set out in its table. So this would need to be done on site. On first arrival, before anything was done, we needed to first get the inverter to actually be able to be commanded by the time of use table correctly, so system was bypassed and both inverters were factory defaulted. Obviously, this isn’t something you should blindly do on a live site without first understanding what settings will be lost and making sure you can restore the required configuration afterwards (this can be done by accessing basic settings then tick the factory reset box, when prompted for a password enter 9999). Once factory defaults were done the inverter was responding correctly to what was programmed on it (its always a good idea to start with factory defaulting electronics when they are not operating as expected before beginning an extensive troubleshooting programme)
The table was then changed to allow batteries to discharge, when the rapid recharge cycle was done, the warnings displayed once again. This was repeated two or three times, each time with the same outcome of the warnings appearing. So now he have this system in a place where we can recreate the fault which means we can properly validate our fix.
First step was to open the front cover of the inverter and start a visual inspection of the inverter to see if any abnormalities could be found, next with these being fans, a general, just listen to the sound, also showed no signs of dying or unhealthy fans. The fix for this one, was quite simple, with the front cover off, next was to access the I/O board seen in the image below (removing the 5 screws will allow the cover come off).
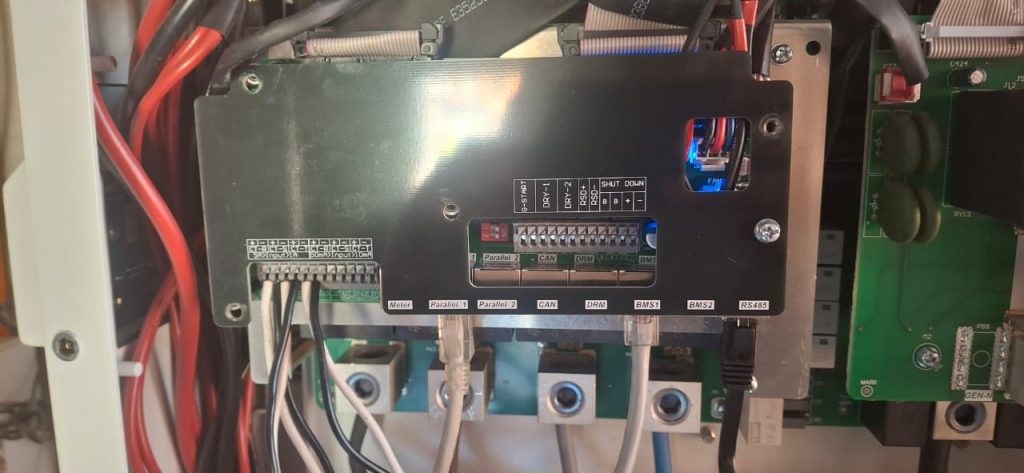
With he cover off it was easy to access the 3 fans sensor cables shown in the image below (im assuming they’re sensor cables and not the actual power cables as with these unplugged the fans did still run). It did appear as if this inverter had been worked on and this board replaced at some point, so my next move was to check if these cables were all seated correctly. All three were unplugged and my same discharge and recharge cycle (ill call it thermal cycling from here out) was carried out again with the exact same expected behavior.
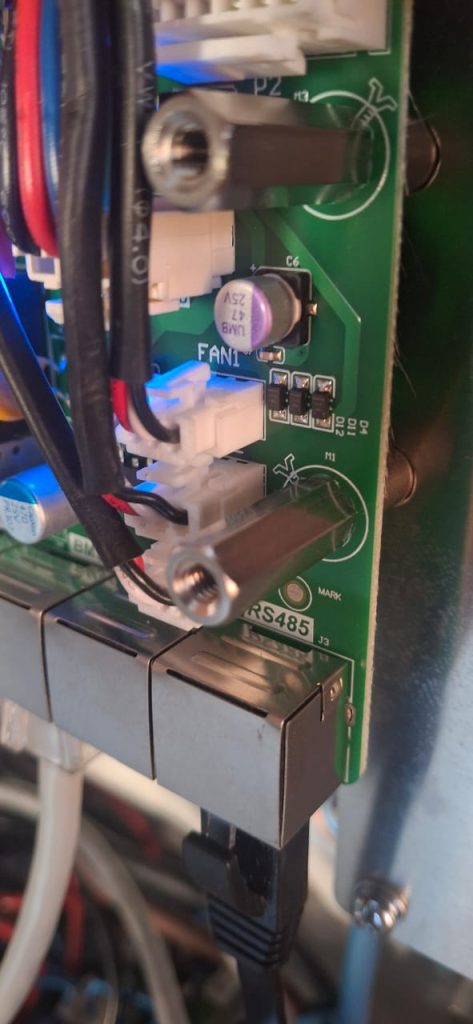
With all three fan connectors disconnected then reseated, I ran the same thermal cycle again and this time no fan warnings were presented, this was done twice more afterwards to confirm. I then proceeded to remove them one by one starting with fan3, with fan3 unplugged we got the warning on fan3 only, then with fan2 only unplugged we got the same warning on fan2 only and the same for fan1 (this can be seen in the images below). What this shows us is that these cables were never seated correctly in the respective sockets, it could be assumed that when the board, if it was, replaced that the plugs were never connected correctly causing the intermittent fan warnings.
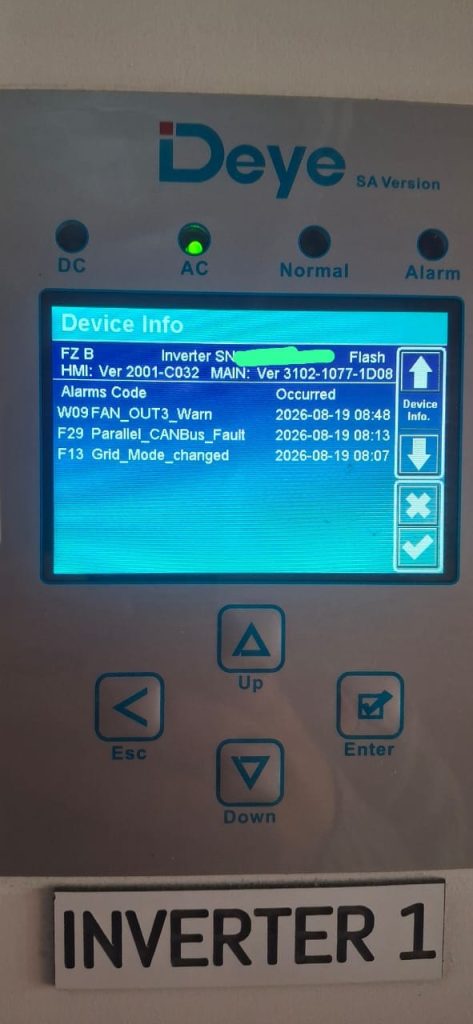
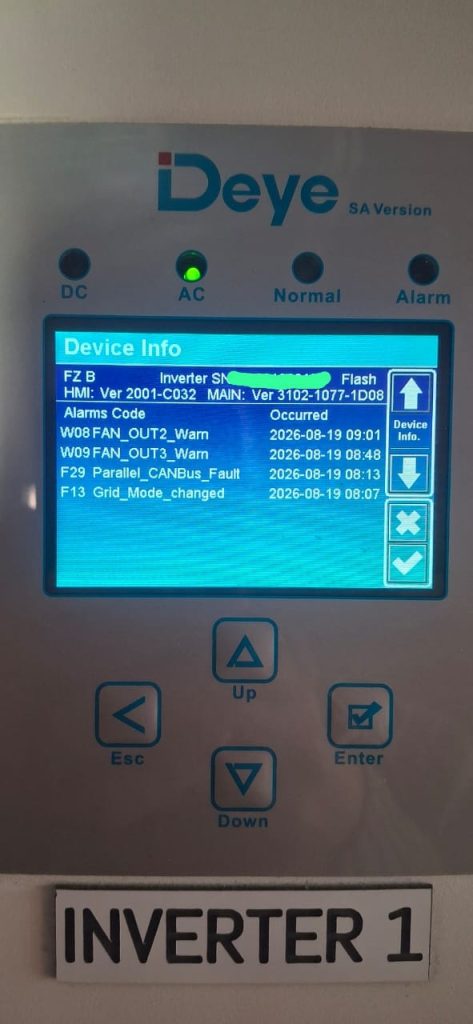
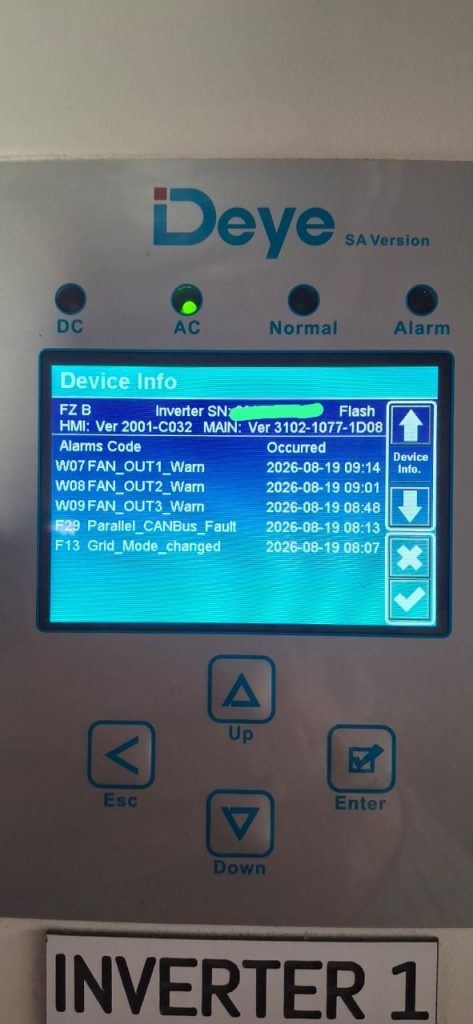
Once I had connected all three of the connectors back, I then spent the rest of the day thermal cycling this inverter to have fans off, back on, ramp up speed etc still trying to see if I could recreate the warnings with no warnings appearing for the rest of the day, which I considered a validated fix given that I was initially able to recreate them using the exact same processes.
Now while this site was a simple fix, and just needed its connectors reseated, it might not always be that simple. You may come across a site at where a fan has failed entirely or the control board has failed and not supplying power to the fans at all. Starting with a quick visual and audio inspection can tell you a lot about where you should be looking. I’ve not needed to replace a fan on one of these before but they do appear to be an easy swap out, so if you can get some spare fans the same testing process can be done to confirm if it was a faulty fan (replace the fans and run a similar thermal cycle, if the warnings remain then its not a faulty fan and may be on control circuitry). Working on a process of elimination starting from easiest and cheapest to most complex and expensive is a process you will want to follow here.